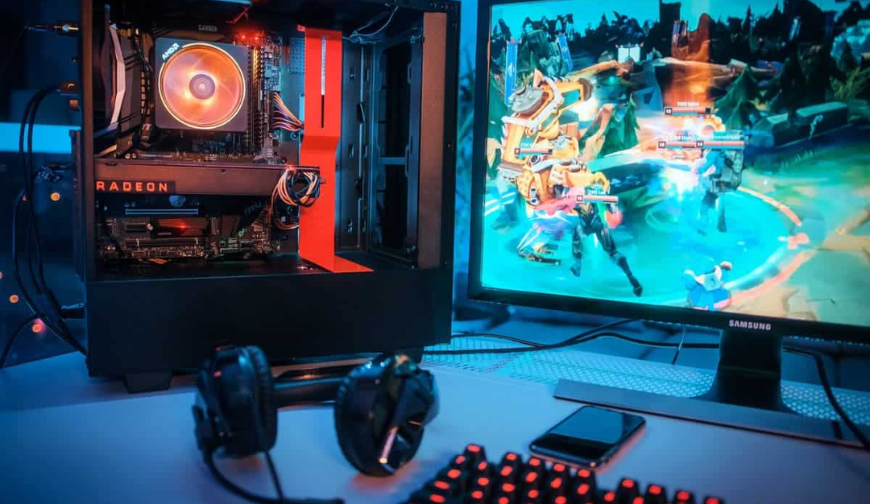
So you want to build your own gaming computer rather than buying a pre-built system?
Good call. If you have the patience, time and passion for it.
Before you read ahead though, I’d recommend you bookmark this page because this is going to be a long guide you’ll want to keep coming back to for reference.
Pre-built systems save you the hassle of buying components and putting them together. More importantly, they save you the time you will be spending on thinking about what you want to buy or not (but don’t worry, we’re here for that too).
But, it is a fact that pre-built systems almost never give you the most bang for your buck. And for the same budget, you can get a killer gaming PC build if you do a custom job.
Hence, like we said before. Good call on wanting to build your own gaming computer.
But how do you go about building your gaming PC? It does sound like a daunting task.
Isn’t it for geeks and nerds you ask?
Won’t I end up buying the wrong parts, or worse, breaking something in the process and wasting hundreds of dollars?
All reasonable concerns.
Believe me, however, it’s not all that hard. You can easily build your computer on your own if you have the right guidance and follow the recommended steps when putting your components together. And that’s why we’re writing this guide.
We’re going to try and make this as comprehensive as possible, using both text and images, and we hope it will help you put together your dream machine. Let’s get started.
Table of Contents
- Pre-build considerations
- #1. Budget
- #2. Requirements
- #3. Researching & picking components
- a) Motherboard
- b) Central Processing Unit
- c) Random Access Memory (RAM)
- d) Graphics Processing Unit (GPU)
- e) Hard Disk Drive (HDD)
- f) Power Supply Unit (PSU)
- g) Solid State Drive (SSD)
- h) Optical Drive
- i) Casing or Chassis
- j) Cooling Components
- k) Monitors and peripherals
- Pre-build Preparation
- Building the Rig
- #1. Installing the CPU
- #2. Installing the CPU Cooler
- #3. Installing RAM
- #4. Installing the Motherboard
- #5. Installing the PSU
- #6. Installing HDDs and SSDs
- #7. Installing the Graphics Card
- #8. Connecting Power, USB, and Cables
- #9. Troubleshooting
Pre-build considerations
Before you go shopping for your gaming PC, you need to take care of a few more things. Let’s go over these considerations quickly.
#1. Budget
What kind of money are you willing to spend building a gaming PC? There is almost no ceiling to this. You can spend an exorbitant amount if you’d like, or as little as $500 for a gaming PC.
The choice is yours, and in my opinion, a very decent budget is around $1,500. But then again, your budget allocation also depends on your requirements.
#2. Requirements
What exactly do you expect from your gaming PC? Do you want it to be flashy? Do you want bleeding edge performance (even if you won’t be utilizing it 100%)? Do you want a multi-screen set up? A bare-bones gaming PC that just gets the job done or would you rather have a PC that runs the latest games at decent settings for the next 2 years or so?
Your requirements dictate your budget and consequently the parts you will pick for your build.
#3. Researching & picking components
Once you’ve picked your requirements and have a budget, you can start researching components. For reference, I’d recommend the following budgets:
- Flashy + Bleeding Edge Performance = $2,000 – $2,500
- Decent Gaming PC for 2 years = $1,300 – $1,800
- Bare-bones Gaming PC = $400 – $500
As we go along, we will be publishing PC builds for all these budgets, but for now, our focus will be on actually building any PC you pick.
And here’s the list of components you need to pick for your build:
- Motherboard
- Central Processing Unit (CPU)
- Random Access Memory (RAM)
- Graphics Processing Unit (GPU)
- Hard Disk Drive (HDD)
- Power Supply Unit (PSU)
- Solid State Drive (SSD) (Optional)
- Optical Drive (Optional)
- Casing or Chassis
- Cooling Fans, CPU Air Cooler or Liquid Cooling, etc.
- Monitor and peripherals
This is a basic list of the components you will need to pick for your gaming build and there are a variety of manufacturers and models available. Now let’s discuss each component quickly so you can get a general picture.
a) Motherboard
The motherboard, as the name suggests, is the core component for your build, upon which everything else depends. Hence, this should be your first pick. Major ‘performance’ motherboard manufacturers are ASUS, MSI, Gigabyte etc, and motherboards generally have one of two chipsets (chipsets are made of components that manage the flow of data from the processor to the memory and then output devices etc) – Intel manufactured or AMD manufactured.
Then you have sockets, which are basically physical components (like latches) that help connect the CPU with the PCB (printed circuit board) like the image shown below.
So there is a brand, a chipset and a socket that you need to pick. While the brand is more of a ‘personal preference’ (ASUS, MSI, and Gigabyte are all great), I’d say the chipset and socket are major considerations.
Your choice of CPU will have to be in line with the socket you pick, and consequently the chipset option you get. If you want to read about chipsets in detail, check out this detailed post on Tom’s Hardware.
Generally, however, people go with Intel chipsets because they want to use the more popular Intel processors as compared to AMD offerings. Intel’s latest socket, at the time of writing, is the LGA 1151v2 (the LGA 1200 is expected soon), and the chipset options you need to pick from with LGA 1151 motherboards are from the Sky Lake, Kaby Lake, and Coffee Lake families.
The differences in these chipsets range from memory support and overclocking options to more USB 3.0 ports, more SATA ports and so on.
At the time of writing, the Z170 is the most recommended chipset currently for gaming PCs.
You should also check out our recommended LGA 1151 motherboards.
b) Central Processing Unit
Now that you’ve shortlisted a motherboard, you need to get a compatible CPU. Assuming you picked an Intel LGA 1151 socket motherboard with a Z170 chipset, you’ll need to get a processor from Intel’s 6th generation lineup.
Yes. There are multiple generations of processors, and in each generation are multiple models. So if we take Intel for reference, you have the i3, the i5, i7 and i9 models in their 10th generation now, but the 6th generation lineup is still commonly in use and more than adequate for budget gaming needs.
The important thing here is that only 6th and 7th generation Intel processors are compatible with LGA 1151 sockets, while 8th and 9th gen need LGA 1151v2. And if you buy an older series processor, it just won’t work with either socket.
If you want to read about the difference between the three main CPU models (i3, i5, i7) in detail, here’s an excellent post by the folks at PC Advisor.
In summary, however, what you need to know is that the i3 series has 2 physical cores while the i5 and i7 series both have 4 physical cores.
Similarly, the i7 has the highest cache memory, followed by the i5 and then the i3. Max turbo-boost frequencies (highest clock speeds a processor can reach under stress) are also in the same order and the same is the case with max integrated graphics frequency.
So essentially, the i7 series is the most powerful (after i9, which is overkill for most gaming needs), followed by i5 and then the i3. However, you don’t really need an i7 if you’re interested in playing games at decent levels – i7s and i9s are more about bleeding-edge performance, especially the unlocked variants which can be overclocked.
The difference between an i5 and i7, in real-world performance, is not all that extreme. But there is surely a noticeable bump when you compare an i5 with an i3.
So basically, if you’re on a budget, go with an i3 – if you want to build a decent PC for the next 2 years, i5 is good and if you want bleeding edge, pick an i7 or i9.
You should also check out our recommended processors for gaming.
c) Random Access Memory (RAM)
RAM is another crucial component that dictates your gaming PC’s performance to a large extent. If your RAM is lacking in size or speed, your frame rates are going to suffer and with them, your whole gaming experience.
With RAM, there are mainly two considerations – size and speed. You will see both DDR3 and DDR4 RAM chips manufactured by brands like Corsair, Kingston and others.
The choice of brand is again, more of a ‘personal preference’ because all high performance RAMs are…high performance.
As for DDR3 (Double Data Rate) and DDR4 – the difference between these two is that of speed. DDR3 RAMs have a max speed of 2133 MHz while DDR4 chips begin from 2133 MHz and go a lot higher. While the performance differences between the two are debatable – you are recommended to pick DDR4 RAM with your 6th generation and higher CPU and an LGA 1151 or LGA 1151v2 motherboard.
Finally, we come to the size of the RAM, which is oft misunderstood to have a consistently correlation with performance. Yes there is a big jump when you go from 2GB RAM to 4GB. But not the big of a difference when you go from 16GB to 32GB.
Most games and applications today are sufficiently balanced with 8GBs of RAM, and the most you should go for is 16GB.
For more details on the differences between the two RAMs, check out this great post by PC Gamers.
You should also check out our recommended DDR3 RAMs for Gaming.
d) Graphics Processing Unit (GPU)
The GPU is the heart of a gaming rig. While you will get integrated graphics with your CPU, you won’t get any performance without a dedicated GPU. Your motherboard, CPU, and RAM are all going to work in tandem with your GPU to deliver cutting-edge graphical processing and gaming performance.
When you’re picking a GPU, there are a couple of basic considerations – Video RAM (VRAM) type, size, and speed, bus-width and core clock speed.
Most people fall for clever marketing, where manufacturers sell graphic cards by highlighting only the VRAM size. They think a GPU with 4GB memory is better than a 2GB one. While that can’t be farther from the truth.
For instance, a low-level card with a high VRAM, but lower clock speeds and memory speeds cannot outperform a mid or high level card with lesser VRAM but higher core and memory speeds.
The same is the case with the bus-width of the GPU. A lot of graphics cards come with the same hardware specs but different bus-widths – 64-bit, 128-bit, 256-bit and so on.
The difference between all these bus-widths is the total amount of information that can be processed per cycle. While bus-widths alone are no indicators of performance capacity, but generally, if everything else is constant in the two GPUs you compare, the one with the higher bus-width will outperform the other.
Again, generally the higher the core and memory speeds, the better performance you will get. But how do you find out exactly which card you should go for?
An easy way for this is to look at all these specs, but also the naming conventions of the two GPU manufacturers, Nvidia and AMD (they bought ATI) – Nvidia cards are the more popular lot, and have consistent naming conventions to denote performance.
Nvidia GPUs are currently in their 2xxx generation. Every generation starts with its serial number and descending order in model numbers, corresponding with higher performance as you go down.
So, in the 9th series of cards, the 9100 was the first, but very low performance, while the 9500 was the entry-level card for low-end gaming. Then you had the 9600, which was a mid-tier card, and then came the 9800, which fell in the high-end category.
Similarly, in the 10th generation of Nvidia cards, 1050 is the entry-level, 1060 is the mid-level, the 1070 and 1080 are high-end models (the same applies in the case of 2xxx models).
These cards then also come with additional labels like GS, GT, Ti and GTX etc to denote variations in clock speeds, memory size, memory speed and any special editions.
For reference, a budget gaming rig would do well with a 1050Ti, a decent gaming PC good for another 2 years or so will be fine with a 1060 or preferably a 1070 if you can afford one, while bleeding edge is GTX 2080.
Recommended for you: Best Budget Graphics Cards for Gaming in 2017
e) Hard Disk Drive (HDD)
Everyone knows hard disks are storage devices and they’ve come a long way over the past decade. About 15 years ago a 20GB HDD was common. Today?
1TB is a baseline.
Since our connectivity grew and faster means of data transfer were developed, storage needs obviously increased too. Regardless of whether you have a lot of photos, videos, and music, or not. You should opt for a 1TB HDD at the very least.
If your budget allows, going over 1TB won’t hurt either. There are mainly two considerations (apart from memory size) when it comes to picking an HDD – the SATA interface and the RPM.
SATA, or Serial AT Attachment is a bus adapter for storage devices, and the current standard is SATA 3.x, or SATA 6Gb/S. The RPM count is basically how fast the disc in your HDD spins – it’s either 5400rpm or 7200rpm – the higher the better.
That’s pretty much it when it comes to HDDs. Popular brands include Western Digital and Seagate, but known names like Hitachi and Toshiba are also in the business.
f) Power Supply Unit (PSU)
The power supply unit is what powers your gaming PC. Unfortunately, a lot of beginners to computer building think PSUs should only be adequate and functional and cut costs on them. But a faulty or low quality power supply could easily burn most if not all of your major PC components under heavy load and electrical surges.
Would you rather risk your $1,000 worth of gear to save $50? Thought not. Popular PSU brands include Corsair, EVGA, Thermaltake and Coolermaster to name a few.
When choosing a PSU, the major considerations are the output wattage, efficiency, and quality rating and whether it is modular or not.
The output wattage is the most obvious figure you’ll come across – 500w, 650w, 800w and so on. This is the wattage a PSU will deliver to your system. So obviously, you want to have a PSU that delivers a little more than your system’s requirement and not under it.
Any system without a dedicated GPU can do with a PSU under 500watts easily. GPUs are the main power hungry components, even though they’ve improved a lot over the past few years. Even now though, if you’ve got a mid-tier dedicated GPU in your system, you should be looking at a minimum of 650watts to be safe.
High-end GPUs will need PSUs with a minimum of 800w and even over 1,000w in extreme performance builds.
As for the efficiency and quality ratings – you’ll come across figures like 80 gold, 80 bronze and so on. The number (80 in this case) is the percentage efficiency while the gold and bronze labels are indicators of the quality of components used inside the PSU, like semi-conductors and such.
PSU efficiency ratings can be simplified like this: a 500w PSU working at 80% will draw (take in from the socket) 600watts so it can deliver it’s rated 500watts (100watts are wasted in conversion from AC to DC etc.). Hence the higher the efficiency, the more power you save in wastage, and consequently the less you pay for electricity.
The quality of semi-conductors is a major factor in any PSUs reliability and output stability. So basically Gold-rated PSUs are better than Bronze or Silver-rated ones.
g) Solid State Drive (SSD)
The use of SSDs has increased over the last few years as more people want the performance boost that comes with solid state drives.
An SSD is like a USB flash drive in simple terms. This is in comparison to a hard disk drive – which has a mechanical reading mechanism dependent on moving parts. If you want to read more details, here’s a great article by Computer Weekly that explains how solid-state storage works.
The main choice with SSDs is the storage size and your budget. SSDs are quite expensive (a 1TB SSD can run over $350) but you won’t be needing a lot of storage capacity because the whole point of an SSD is to house the operating system for faster core performance.
This means an SSD has much faster data access times and input output. Which essentially leads to faster performance than a regular HDD. Hence, most people go for a 120GB SSD for their operating system installation and any other intensive apps or games they may want to run with a slight boost.
It’s unnecessary for a budget or mid-level gaming rig, but is advised for high-end gaming computers for maximum performance. As for brands, Samsung is one of the most popular SSD sellers at the moment and their EVO and PRO lines do well.
h) Optical Drive
We won’t be discussing optical drives in detail. They are more or less obsolete now unless you have an old collection of burned DVDs with home videos or photos. All PC games are now on digital downloads and gaming cases can do with the saved space.
However, if you’re looking for an optical drive, you can buy a very decent external DVD Rewriter for about $30 and it should be more than enough for all your needs.
i) Casing or Chassis
When you’ve got all your components lined up, you’ll need housing for them, and that’s where the casing comes in. I personally am a big fan of boldly designed casings that are aggressive in appearance and performance-oriented.
When buying cases the major considerations are design (look), cooling options (fan mounts, etc) and your budget.
Cases can cost as low as $40 or as high as $200+, so your budget is important here. Then obviously you need to pick a case that looks good to you. But most importantly you need to pick a case that has good cooling options.
Most performance cases have between 5 to 10 cooling fan mounts for superior airflow. Basically you want air intake from the front and exhaust from the rear. A lot of cases come with exhaust fans at the rear, bottom and top and room for water cooling kits as well.
Windowed panes are also a consideration, with a lot of gamers wanting to show off their hardware via the case’s side window in all its glory.
We recommend that you pick a case that looks good and gives you adequate cooling options (most performance cases have around the same number of fan mounts) within your budget and go with it.
j) Cooling Components
Since you’re building a gaming PC, you want performance, and performance comes with heat, a lot of heat. Which is why you’ll need proper cooling for your gaming rig to maintain safe temperatures, especially for the CPU and the GPU.
Cooling is generally divided into air cooling and liquid cooling. And for most cases, air cooling is adequate and is what we also recommend our users because liquid cooling also comes with risks and maintenance requirements.
If you’re interested, you can read more about the pitfalls of liquid cooling in this post by Puget Systems.
With air cooling, you have some stock components that you’ll get with your CPU and the chassis you buy. The CPU with come with its own stock cooler and the casing you buy will also come with a fan or two at the rear.
Buying your own custom cooling components has three major considerations – buying an aftermarket CPU air cooler, buying extra fans for your casing and choosing the size of additional chassis fans.
Starting with an aftermarket CPU cooler, there are tons of brands out there (Coolermaster, Thermaltake and ASUS, etc) and you basically get a large heatsink (copper usually for the most efficient heat dissipation) and a fan to cool the heatsink itself, creating an airflow.
These days most air coolers are compatible with both Intel and AMD sockets and CPUs, so that’s not a problem. You just need to pick something that looks good to you, but just try and not go overboard because some air coolers with massive heatsinks have been known to bend the motherboard under their weight eventually.
After a CPU cooler, you’ll need to buy additional fans for your casing and most common mounts in all cases are the front, the top, and the bottom. Count the mounts you have in your case and then get the appropriate number of fans from manufacturers like Coolermaster.
I prefer 120mm LED fans because they look good and push a reasonable amount of air but you can also check if your case supports 140mm or 200mm fans. When installing fans, you should take care of the direction you put your fan in, because that will dictate whether your case pulls air in or sends it out.
Generally, a cooling fan will throw the air behind it. So the fan shown below will be taking air from the side facing us and pushing it towards the back.
k) Monitors and peripherals
Once you’ve picked your hardware, you’ll need to get a monitor for the display output and peripherals like a gaming keyboard, mouse and headphones, etc.
Firstly, when choosing a display for your gaming rig, the major considerations are the display size, resolution and refresh rate.
The display size is simply denoted in inches – 27″, 32″ and so on. Basically the larger the display size, the larger the monitor and output.
But the main consideration is the resolution (800 x 600, 1024 x 768 are resolutions – indicating the width and height of the image being pushed in pixels), followed by refresh rate. Even if a display size is 50 inches, if it is running at a poor resolution the image quality will suffer greatly.
Technically, the higher a display’s resolution the clearer and crisper will be the output you get. And the higher the refresh rate the smoother your gameplay will appear.
If you ever switched to the first ever retina Macbook Pro from a regular 768p (1366×768 resolution) laptop, you’d have seen the unbelievable clarity that comes with a 2560 x 1600 resolution display.
But, on a side note, just because you have a display that pumps out 2560 x 1600 resolution images, does not mean you will be able to game at that resolution as well. See the thing about pushing pixels is that it requires considerable graphics processing power.
So running a game at 800 x 600 is much less resource intensive as running it on 2560 x 1600. And if your GPU is weak, you’ll get terrible frame rates at higher resolutions. Which is why you should not just aim for the highest res monitor you can buy.
You’ll also hear terms like 2K and 4K now, which are basically short terms for denoting monitors that can push 2000+ and 4000+ resolutions.
We recommend that you get a 1080p (1920 x 1080) monitor at the very least, and if you can spend more, get a 2K monitor to go with your extreme gaming build. 4K displays are also beautiful, but overkill if you’re rig isn’t a gaming beast.
As for the refresh rate of your display. You’ll read terms like 60Hz, 120Hz and 144Hz etc. This frequency is the number of times per second a display refreshes its image. How does it affect you? Technically, in a number of ways and you can read this detailed post by Digital Trends for more details. But we recommend that you go for a 120Hz display when possible.
As for gaming gear and peripherals. We’re not going to discuss them in detail here but you can check out our selection of mechanical keyboards for gaming and earbuds. Moreover, if you’re going to be using your gaming PC for streaming games on platforms like Twitch or Mixer, you should check out our list of the best webcams for streaming.
Pre-build Preparation
Okay, now that you’re component shopping is done, you need to start preparing for your actual build. Excited? You should be.
Firstly though you need to have a clean, wide table to set your stuff upon. Don’t build your PC on a carpeted floor (a lot of people make that mistake) because it can lead to static charge buildup, which can literally fry your costly gaming gear.
Secondly, you want to have all your components nearby and your motherboard manual out. Here’s an image showing the layout of a Gigabyte Z170 motherboard:
Building the Rig
Now we can start putting the components together for your gaming rig. As we go along, we’re going to be referring to the diagram above as well as animations you’ll be looking at in the steps below.
Let’s get this started.
#1. Installing the CPU
Start by unpacking your motherboard, which should be wrapped in an anti-static sheet. Put it out on your table (needless to say, but don’t have any liquids around your build area) and locate the CPU socket which is indicated on the diagram above as the large rectangular metal clasp.
It should have a protective cover, which you need to remove and then push the pin lever towards the right to release the clasp and pull it up to open the socket so you can install the CPU.
Unpack the CPU now and look for an arrow on the bottom-left corner which should be matched with the arrow on the socket so the positioning is right. The CPU pins face downwards and the silver metal plate stays upwards.
If you do it right, the CPU just falls into place and does not need any pushing down. Once it sets in, just close the socket cover and lock it with the pin mechanism, just how you opened it in the first place. The animation below shows you exactly how this step works.
#2. Installing the CPU Cooler
This is one of the most technically challenging parts of the whole build if you’re going with an aftermarket cooler. Installing the stock cooler is relatively easy though, but most gaming enthusiasts prefer third party coolers because they are silent and keep overclocked CPUs cooler.
Let’s look at Intel’s stock cooler first.
Pretty simple right? Installing it is a breeze too. The heatsink is the silver aluminum fins structure at the bottom with the fan mounted on the top. You also get a power connector for juice.
You’ll find a small pack of thermal gel with the cooler, just open it up and take it out at the base of the heatsink, which will be resting on top of the CPU’s silver plate.
Then you need to fit the cooler by lining it up on top of your CPU with the Intel logo right side up and aligning the pegs with the holes on the motherboard. Push down on the pegs and rotate them in the direction of their arrows and you should hear an audible clicking sound to confirm that they are locked. That’s it. Now just connect the power cable and you’re good to go.
Now let’s look at installing an aftermarket CPU cooler.
This is tricky because aftermarket coolers are usually bulky and use copper, which is heavier than aluminum, and need proper support (they can’t do with clips like the Intel stock cooler).
So the first step is to unpack the cooler and take out the backplate which goes behind the CPU socket (on the other side of the motherboard) to provide support for the front mounts.
The cooler’s manual should come with directions about picking the right backplate for your socket (AMD and Intel have different backplate designs) and you’ll need to screw the backplate into the motherboard from the back to make a mount for the front-end fitting.
Now that the backplate is installed, you’ll need to mount the heatsink on the front, to sit atop the CPU. For that, some coolers need the fan to be taken off the heatsink for convenience (it can be clipped back on later), while some coolers have a fan built-into the heatsink, which can’t be removed.
You need to get thermal paste again and take it out at the base of the heatsink (don’t spread it out), then place it down on the CPU and press it just a little to spread the paste thin between.
Now, according to your cooler’s manual and design, you’ll need to secure the heatsink by screws or clips that will go into the mounts pushed up by the backplate from behind. Once you secure the heatsink properly, you can attach the fan if you took it off, or just plug the power connector into your motherboard and you’ll be set. The animation below shows how to work the heatsink and set it up on the CPU.
#3. Installing RAM
RAM installation is very simple, the main consideration is matching the pattern of connectors with the slot.
You start by opening the clips at the end of the slots and lining up the RAM chip with the first slot (marked on the diagram above) and pushing it in gently first, and when it slides in a little, push firmly at the end and the clips should come back up and the slot should get locked in automatically (you can lock it manually too if needed).
You’ve probably also heard of dual-channel memory performance and that’s basically just inserting two RAM chips in color-matching slots. Installing the RAM is probably the safest step when building your own rig.
#4. Installing the Motherboard
Now that you’ve installed the CPU, cooler, and RAM on the board, you should set the board into your casing. Open up your casing’s right panel and locate the small standoffs you got with your casing.
These are small brass mounts that go into holes into the casing’s plate at the back, making space for screws that will then secure the motherboard.
These standoffs will go into holes marked according to motherboard types. You’re most likely installing an ATX size board so place the standoffs in the right places.
Your board should also come with an i/o shield that should be installed at the back of the case to make way for the connectivity panel on your board that houses the USB ports etc.
Now place the motherboard on the casing plate and align the standoffs with the holes on the board before using screws to secure it.
#5. Installing the PSU
After the motherboard is installed, you should get the PSU in. Back in the day the power supply used to get housed at the top, but now, with gaming systems, the PSU goes at the bottom of the case.
The process is simple. You put the PSU down on the rear bottom of the case with its power input and switch facing outwards from the back of the case. The PSU has a fan that needs to face towards a vent, and most cases have vents at the bottom for this purpose.
Once it’s lined up, you need to screw it in place from the back of the case and it should be fixed securely. Now depending on your PSU type, you can either have the cables in the case or attach them as you need them (if it’s a modular PSU).
#6. Installing HDDs and SSDs
Towards the front of your case, you’ll have the hard drive bays which will house your HDDs. Some cases have screw-less HDD installation (which I prefer), where you just use a clip to remove the bay tray, slide in your HDD and set the tray back in the bay.
Depending on your case and it’s bays, you will need to install the HDDs with either screws or custom tray latches.
SSDs can also be installed in the regular HDD bays in some cases while others come with a back panel mount under the CPU cooler bracket installed behind the motherboard.
All your drives will come with their own cables, which go at the back – and are plugged into the motherboards SATA ports.
Power cables to these drives will also come from the PSU you installed earlier.
#7. Installing the Graphics Card
Now let’s get to the big event – installing the graphics card. It’s actually quite simple. You need to just place the card on the PCIEX16 slot indicated in the diagram above and push it in just a little till you hear the clip close.
Now you just use one or two screws that came with your card to fit it into place on the side of the PCIe panel.
After that you just need to connect any 4 or 6-pin connectors on your card via the cables on your PSU.
#8. Connecting Power, USB, and Cables
You’re almost good to go. Now you just need to connect all the cables. The main power cable from the PSU will be going into the motherboard and similarly, cables from the casing’s external ports will also go into the motherboard switches.
#9. Troubleshooting
Once all the cables are securely attached you can start troubleshooting the system after connecting it with your monitor and plugging in the PSU.
You should also connect your keyboard and mouse into USB ports and then boot the system. If you see no display at all – obviously something is amiss. I’d start by making sure the Molex cable, the main one going to the motherboard, is securely set (it needs some pushing in at times).
You can also check if your motherboard is getting power by checking the CPU cooler fan or any fans attached to the motherboard.
If you hear an error beeping sound at boot you may want to check your RAMs and try to plug them in again and double-check all cables.
When everything is set, you should get a display on the monitor and enter BIOS to check if all is in order.
That’s it. Now you can just power up your system, install Windows or your operating system of choice on it and get the party started.
We hope this guide serves as a good reference guide for people wanting to build their own gaming PCs. Please note that even the most comprehensive guide will not be able to cover each and every step in extreme detail because varying components have different steps.
However, this guide goes over all the major steps involved in building your own PC and we recommend that you keep all product manuals with you while you do this. If you run into any issues or have any questions, feel free to get in touch with us via the comments below and we’d love to help. We will also be updating this guide as we go along and making it more useful for all the people out there wanting to build their own rigs. If you’re interested in contributing to this guide, please comment below and we will contact you back.